Cloud Volume ONTAPからスペアディスクを削除する方法
環境
- NetApp BlueXP
- NetApp Cloud Volume ONTAP(CVO)
概要
- System Managerからアグリゲートを削除する場合やBlueXP ではなくCVO CLIを使用する場合など、特定のシナリオでCVOに スペアディスクが作成されます。
- 場合によっては、新しく購入したディスクをBlueXP で適切に追加できず、スペアディスクがCVO CLIに表示されることがあります。
- この手順では、CVOからスペアディスクを完全に削除する方法について説明します。
手順
- 同じディスクを使用してアグリゲートを作成します(System Manager /コマンドラインを使用)。
CVOcluster ::>disk show -container-type spare
任意のハイパーバイザーまたはAzure-HA上のCVOシングルノードクラスタの場合は、次のコマンドを使用します。
CVOcluster ::>storage aggregate create -aggregate <aggr name> -diskcount #ofspares -simulate
アグリゲートの作成が正常に完了したことを確認してから、「-simulate" 」オプションを指定せずにコマンドを繰り返します。
AWSまたはGCPのCVO HAクラスタの場合は、次のコマンドを使用します(Azure-HAには該当しません)。
CVOcluster ::>storage aggregate create -aggregate <aggr name> -mirror -diskcount #ofspares -simulate
アグリゲートの作成が正常に完了したことを確認してから、「-simulate" 」オプションを指定せずにコマンドを繰り返します。
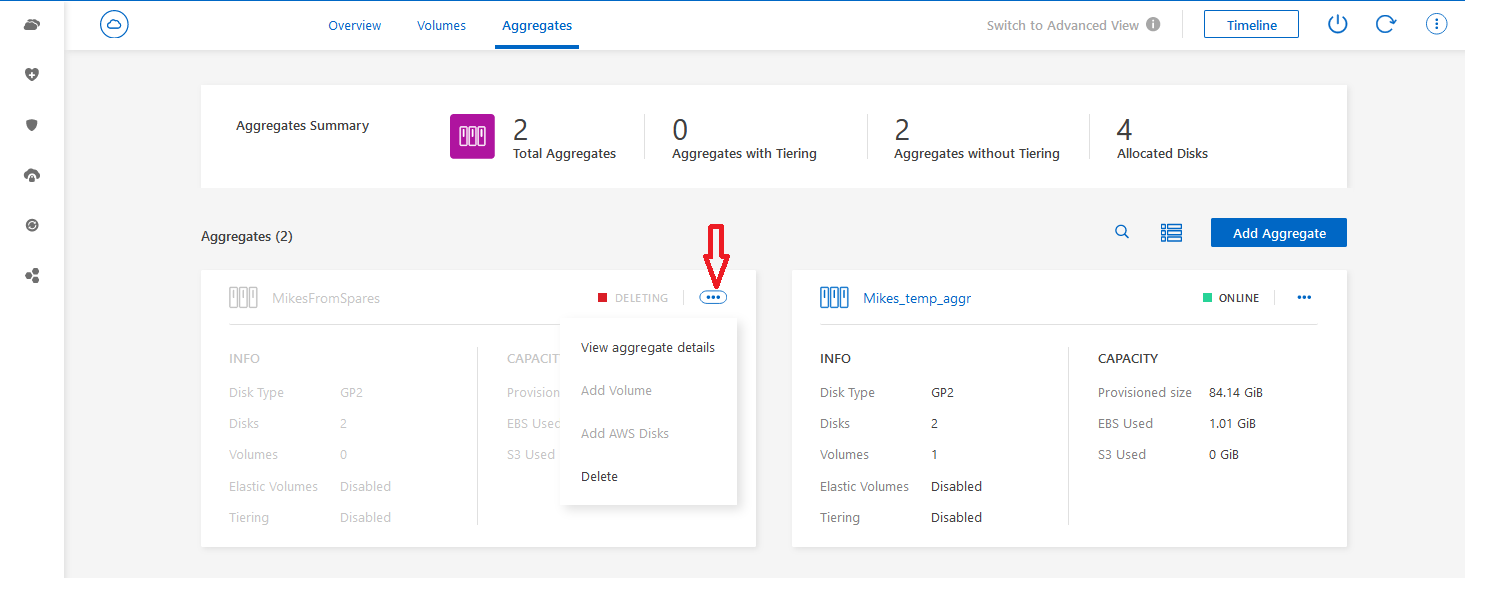
- コネクタからアグリゲートを削除します。
注:コネクタからアグリゲートを削除すると、CVOとクラウドプロバイダのインフラからディスクが完全に削除されます。
BlueXP Connector UIに接続し、[Aggregates]タブに移動し、アグリゲートのメニュー(3つのドット)をクリックして[Delete]を選択します。

3.スペアディスクが削除されていない場合は、NetAppテクニカルサポートに連絡して、この資料を参照してください。